M4A3 Sherman Platoon (UBX29)
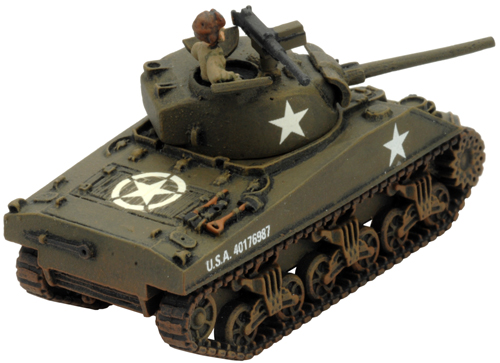
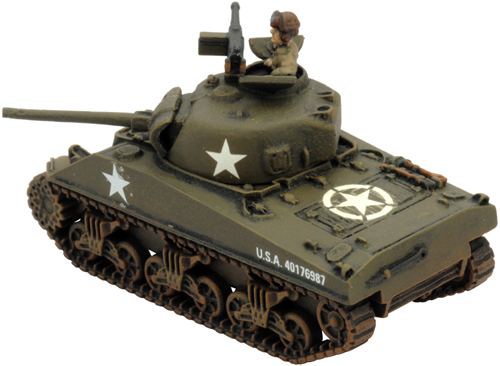
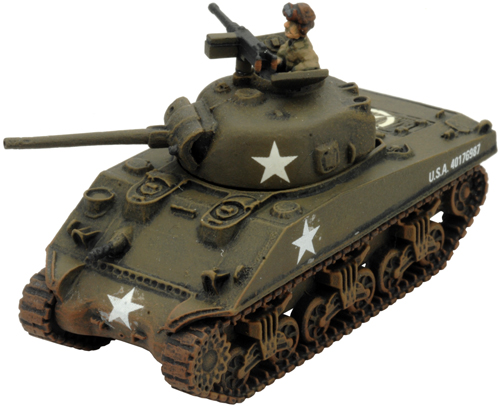
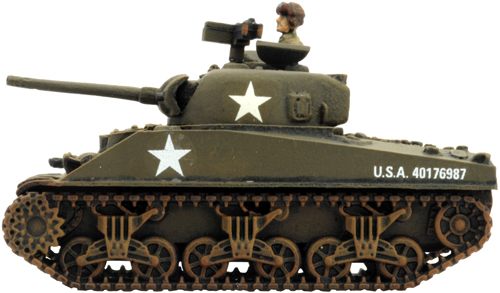
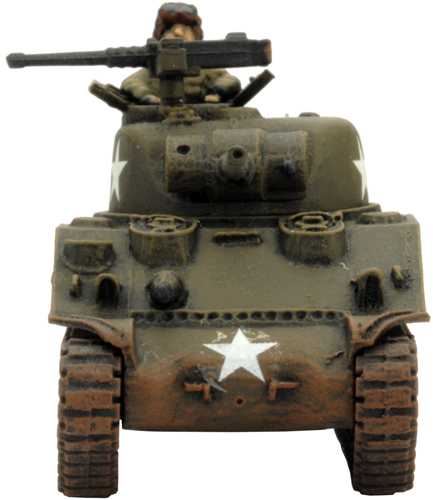
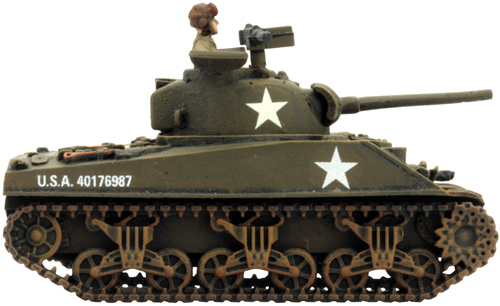
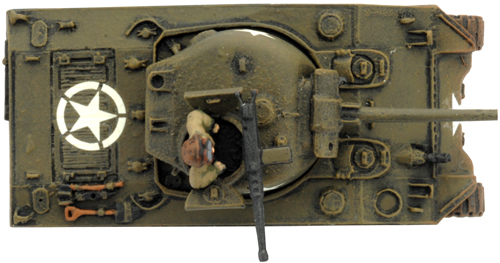
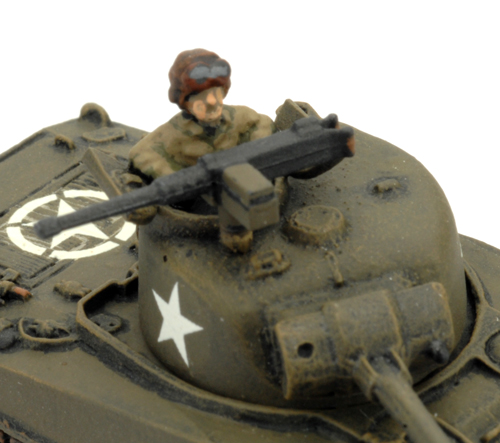
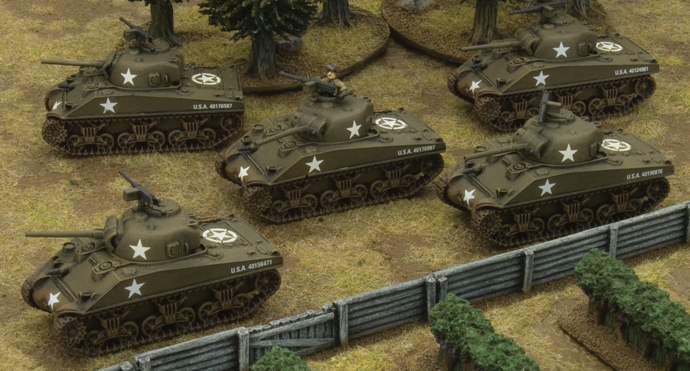
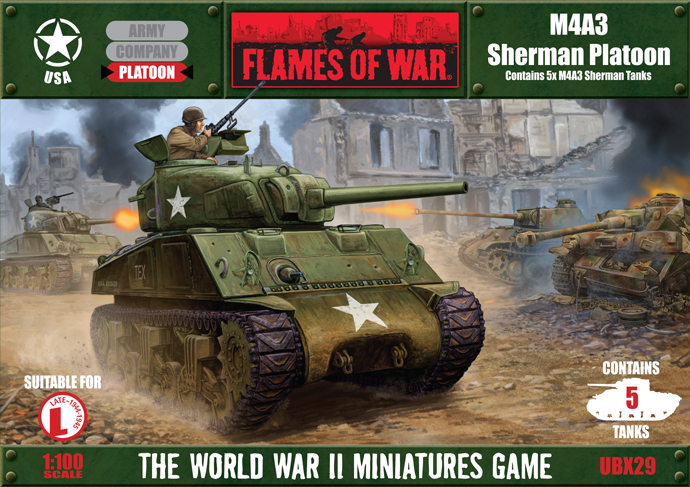 | M4A3 Sherman Platoon (UBX29) includes five M4A3 Sherman tanks, one Tank Commander sprue, two Tank Stowage sprues, five Plastic Sherman sprues, one Decal sheet & ten Rare-earth magnets. The M4A3 was developed as a replacement model for the M4 and M4A1. There are two major features that you can use to identify an M4A3 Sherman tank. The first is the single-piece transmission housing on the front of the tank, rather than the bolted multi-part housing on older models. Check out the M4A3 Sherman Platoon in the online store here... |
| Blood, Guts, & Glory It’s September 1944 and the Allies have stormed across France all along the front lines from Belgium to the French region of the Lorraine. Blood, Guts, & Glory covers the tanks battles in the Lorraine between September 1944 and January 1945. Learn more about Blood, Guts, & Glory here... |  |
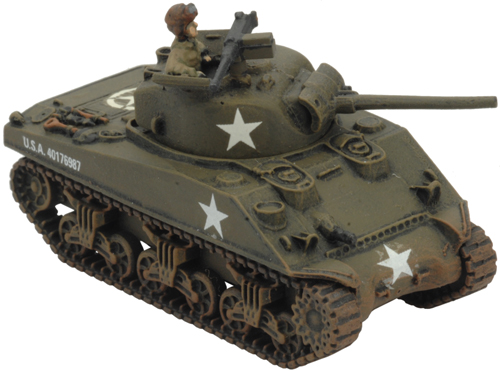
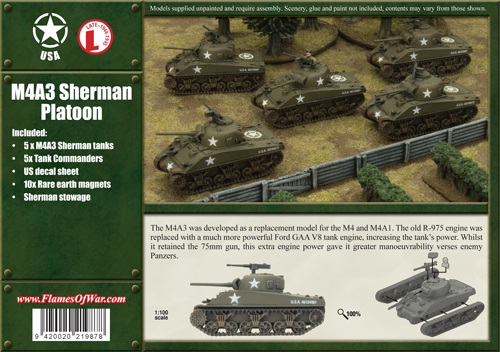 | The second major change in the M4A3 was its engine. This version replaced the old R-975 engine with a much more powerful Ford GAA V8 tank engine, increasing the tank’s power. The M4A3 first saw action as replacement vehicles from August 1944 and served to the end of the war. Designed by Evan Allen Painted by Blake Coster | ||||||||||||||||||||||||||||||
| The M4A3 Sherman in Flames Of War | |||||||||||||||||||||||||||||||
| |||||||||||||||||||||||||||||||
 |  |
| Stabilisers A stabiliser is a device fitted to the tank’s gun that keeps it level when the tank is moving. US tanks are the first in the world to be equipped with gyrostabilisers as standard. With the assistance of the gyrostabiliser, the gunner can stay on target while the tank is moving. A moving tank fitted with a Stabiliser can fire its main gun at its full ROF, but adds a penalty of +1 to the score needed to hit. Before shooting, a tank can choose not to use its Stabiliser and fire at the normal rate if that would give it a better chance. | |
 |  |
| Detroit’s Finest The Ford V8 engine improved the performance of the M4A3 series of tanks. Its power gave them a good top speed, while its robustness and reliability allowed them to take advantage of this without worrying about breaking down. Tanks that use the Detroit’s Finest special rule have a Movement Distance of 14”/35cm on Roads or Cross-country Terrain. | |
 |  |
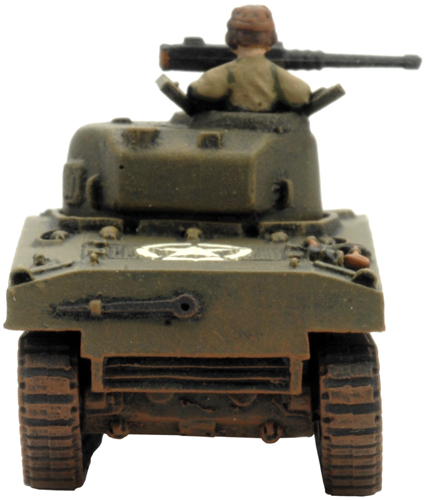
| Tank Telephones By the end of 1944, most Sherman tanks working with infantry had been fitted with field telephones on the rear to allow the infantry to point out targets to the tanks. If a Tank team with Tank Telephone and an adjacent Infantry team did not move in the Movement Step, and the Infantry team is not Pinned Down, the Infantry team can use the Eyes and Ears rule (see page 195 of the rulebook) to Reveal one Gone to Ground enemy team to that Tank team as if the Infantry team was a Recce team. If other tanks in the platoon fire, they must either have their own Infantry team pointing out the target or continue to treat the target as Gone to Ground. | |
 |  |
| Smoke Sometimes your weapons won’t destroy the enemy quickly enough to prevent them from wreaking havoc on your own troops first. One way to protect your troops in the meanwhile is to fire smoke at the enemy to temporarily impair their vision. Only weapons listed as having the Smoke attribute in their Arsenal may fire smoke. Some weapons can also fire Smoke Bombardments (see page 136 of the main rulebook). | |
 |  |
| The M4A3 Sherman Platoon Moves Out |
 |
| The Contents of the M4A3 Sherman Platoon Box Set |
| Contact the customer service team at customerservice@battlefront.co.nz if you have any issues with any of the components. |
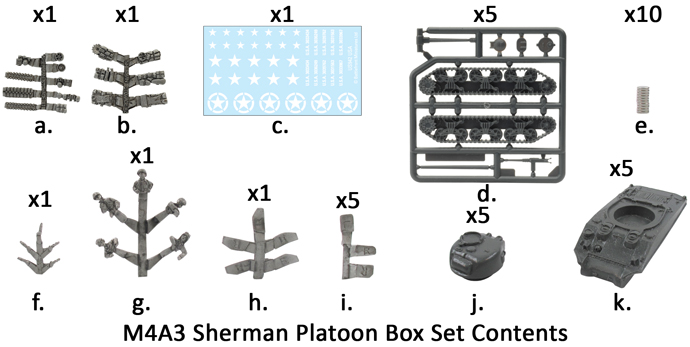 |
| Description of Components |
| a. 1x Sherman stowage sprue #1. b. 1x Sherman stowage sprue #2. c. 1x US decal sheet. d. 5x Plastic Sherman sprue. e. 10x Rare-earth magnets. f. 1x Hull MG sprue. | g. 1x Tank commander sprue. h. 1x Turret appliqué armour sprue. i. 5x Hull appliqué armour sprues. j. 5x M4A3 resin turrets. k. 5x M4A3 resin hulls. |
| The Plastic Sherman Sprue The parts of the plastic Sherman sprue that are used when assembling the M4A3 Sherman are highlighted in green. Right: The highlighted parts of the plastic Sherman sprue used in the construction the M4A3 Sherman. | 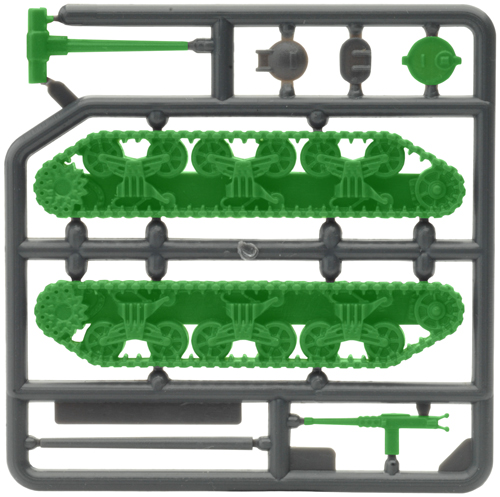 |
| Assembling The M4A3 Sherman |
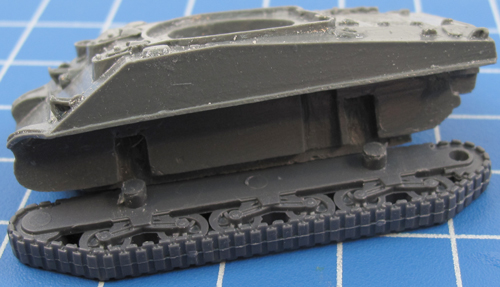
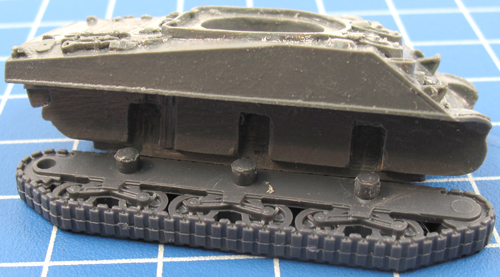
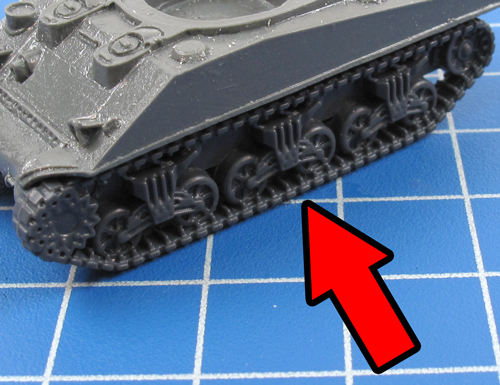
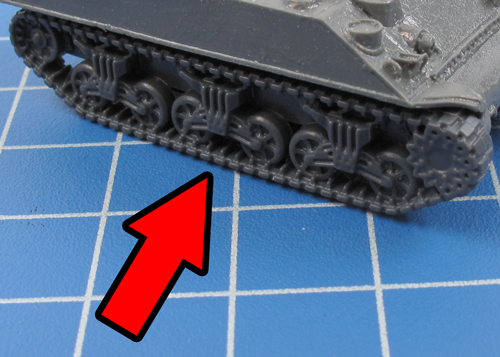
| Step 1. Begin assembly by attaching the tracks to the hull of the M4A3 Sherman. Note: Each track has a number of lugs on the back that corresponds with the recesses in the hull to aid in correct orientation. |
| Below: The correct alignment for the left-hand side track. | Below: The correct alignment for the right-hand side track. | Below: The left-hand side track attached to the hull. |
 |  |  |
| Below: The right-hand side track attached to the hull. | Step 2. To add the hull MG, snip off the ball mount using a pair of hobby cutters. | |
 | 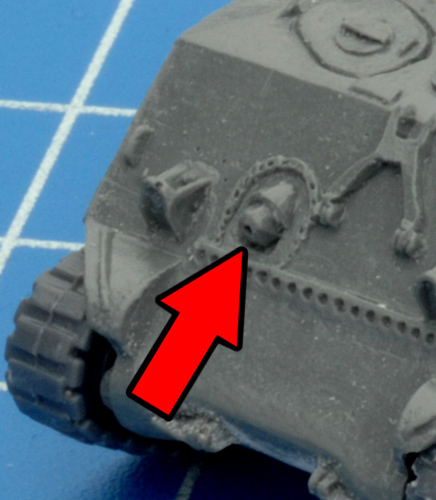 | 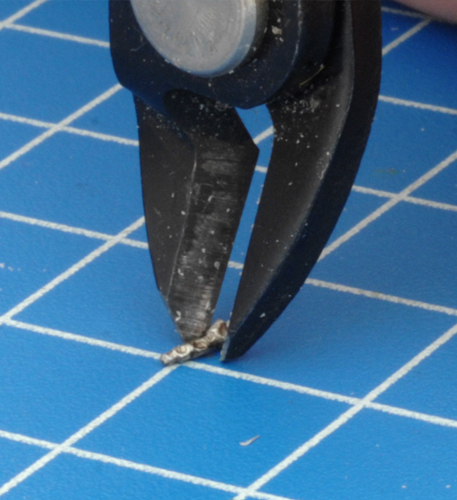 |
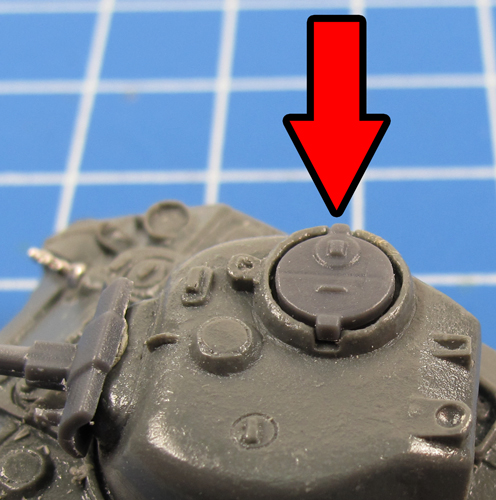
| Step 3. Attach the hull MG to the hull. | Step 4. Next, add the 75mm main gun. | Step 5. Attach the commander's hatch to the top of the turret. |
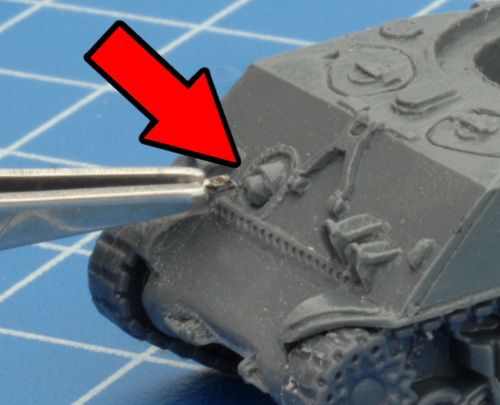 | 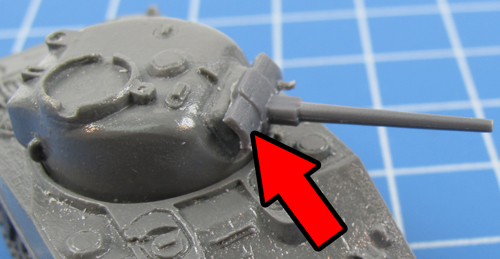 |  |
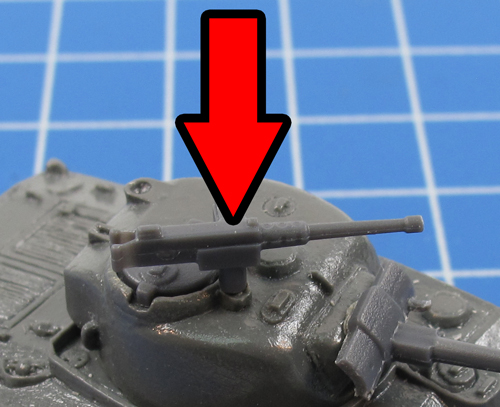
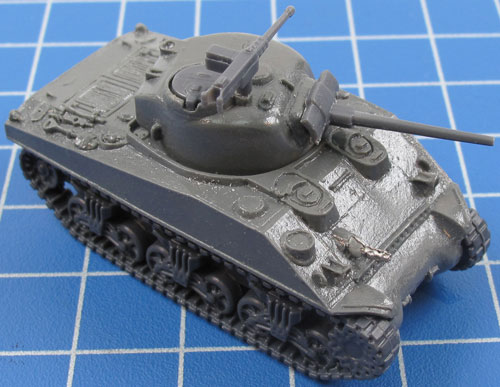
| Step 6. Next, add the .50 cal AA MG. | Step 7. With the .50 cal AA MG in place, the M4A3 Sherman is now ready for painting. |
 |  |
| Adding a Tank Commander |
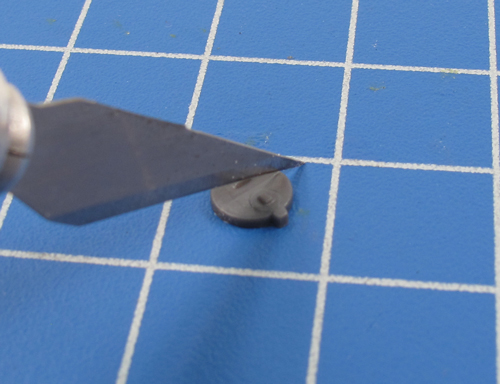
| Step 1. Cut the commander's hatch in half using a sharp hobby knife. | Step 2. Attach the two halves of the hatch to either side of the hatch recess. | |
 | 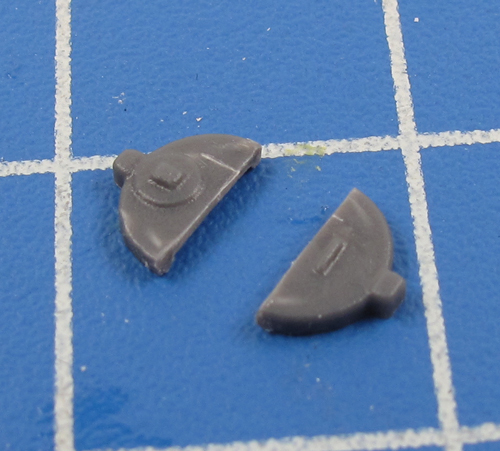 | 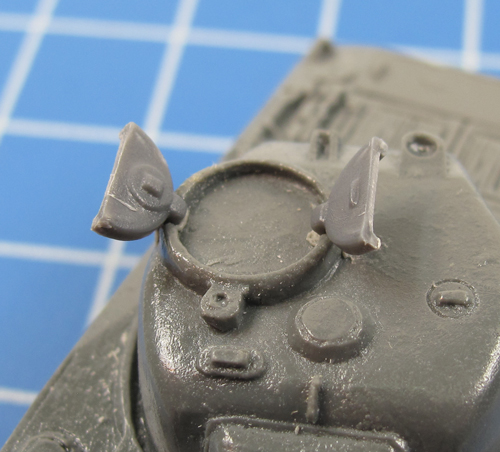 |
| Step 3. Add the tank commander figure of your choice. | Step 4. Finally, add the .50 cal AA MG. Tip: You'll need to angle the .50 cal AA MG slightly so not to interfere with the tank commander. |
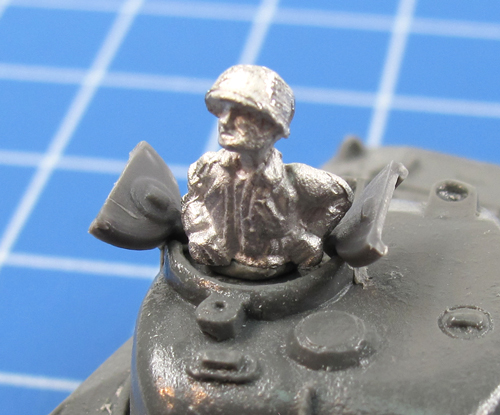 | 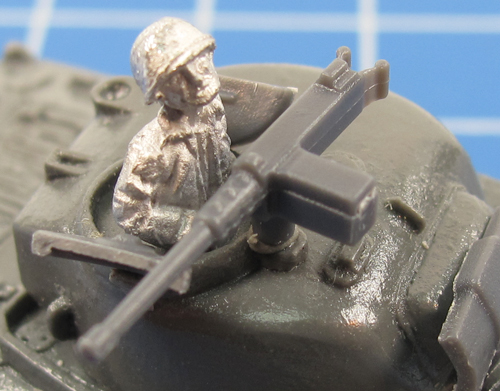 |
| Adding Appliqué Armour |
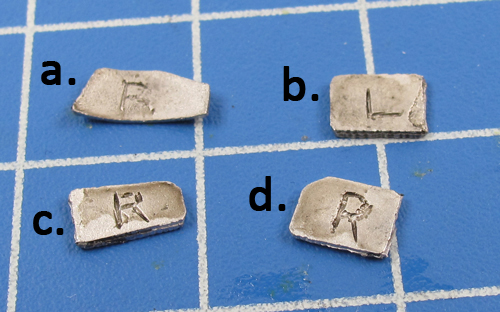
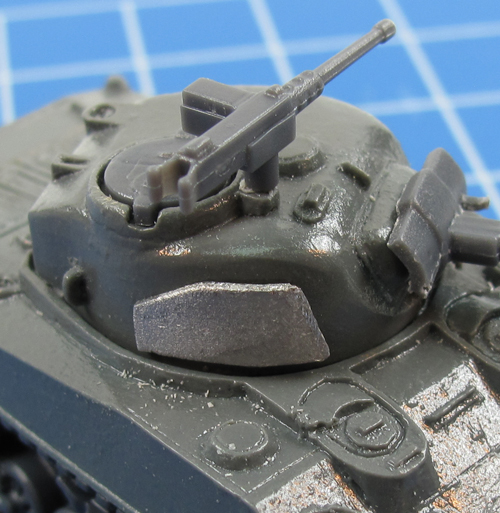
| Each piece of appliequé armour has been labelled to idicate which side of the tank it attaches. Description: a.Turret right-hand side; b. Hull left-hand side; c. & d. Hull right-hand side. | Below: The turret appliequé armour in the current location. |
 |  |
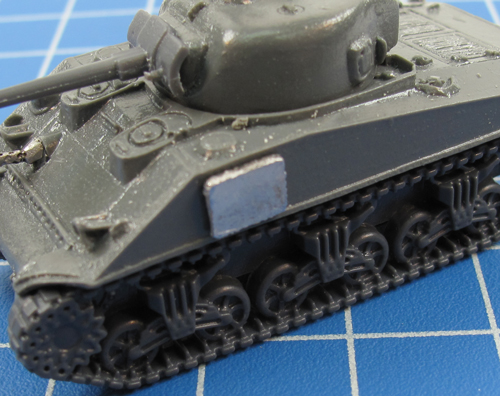
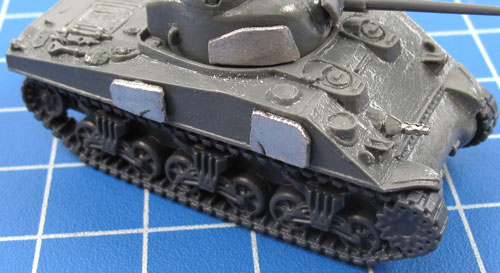
| Below: The left-side hull appliequé armour in the correct location. | Below: The right-side hull appliequé armour in the correct location. |
 |  |
Last Updated On Monday, January 01, 0001 by Blake at Battlefront

Ingen kommentarer:
Legg inn en kommentar