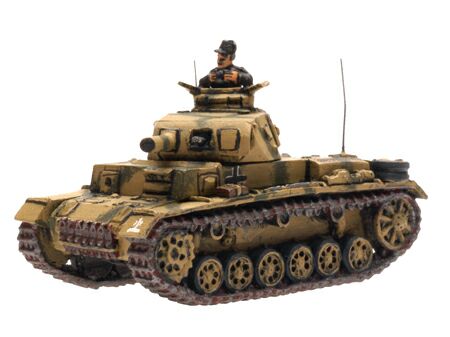
 | How to make a Panzer III OP tank Modelling With Evan You’ve glued together and painted a battery of Wespe or Hummel SPG’s and now you need that OP tank in the FoW list for your Artillery Observer to live in. Why do you actually need an OP tank and what is it exactly? When the Germans introduced the Wespe and Hummel Self Propelled Guns into service in the Panzer Division Artillery Batteries during 1943 they needed a suitable vehicle so that the Observers could keep up with the tanks they were meant to support. |
| Artillery Observers driving around in anything other than a tank in the midst of your force of Panzers is not going to last long! The Panzer III was becoming obsolescent, especially the earlier variants, and so the Germans created the "Artillery-Panzer- Beobachtungswagen (Panzer III) (Sd Kfz143)" what a mouthful! I’ll refer to them as "OP Tank" from here on I think. 262 Panzer III’s, mostly Ausf E,F,G and H, were converted to this role and were vital for providing Artillery support for the hard pressed Panzer units on the battlefield. The main difference between the OP Tank and the standard Panzer III was the removal of the main gun to provide more internal room for the radios required by the observer team. But also, so as not to be picked out from the crowd of surrounding Panzers, a dummy gun barrel was added. | 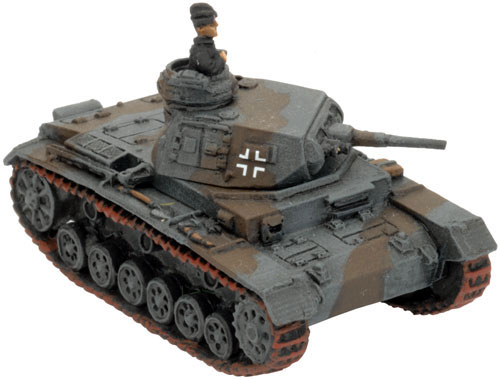 |
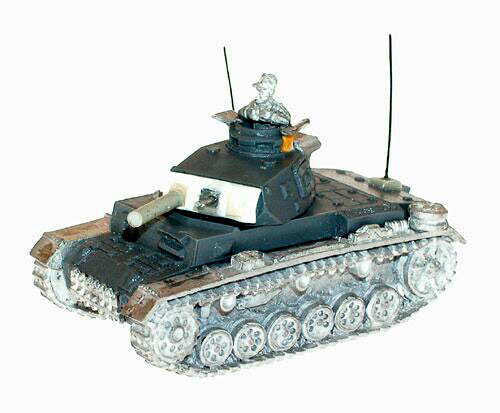
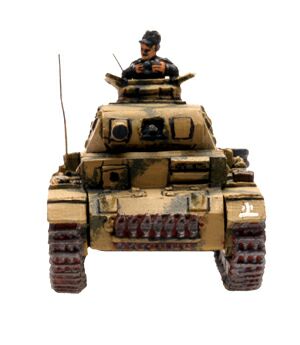
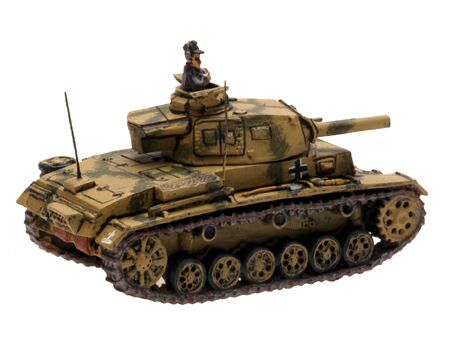
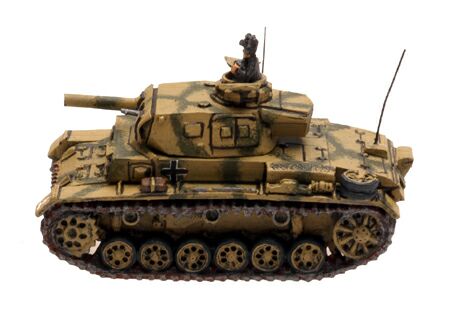
I’ve chosen a Panzer IIIE (GE030, this early war tank is currently unavailable and GE031 or GE033 can be easily used instead) to become an OP Tank and looking at the photos you can see not much is needed to complete the change. Step 1Assemble the kit as normal except leave off the main gun. |
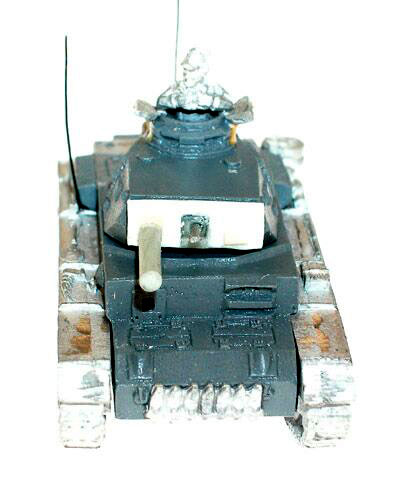
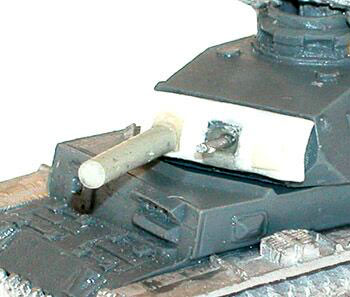 | Step 2 The turret: trim off the external MG (this normally remains when you fit the 37mm gun barrel) and make a new Mantlet, I used thick artists paper for this, then cut two smaller squares and add to the new mantlet just inset from either end. In the middle of the new mantlet cut out a small square, about the same size as the existing square in the original resin. Add to the middle of the RH square on the mantlet your dummy gun barrel, I’ve used a piece of putty rolled out and trimmed but you can use any straight piece of tube for this like brass or aluminium tubing. For self protection the Germans added an MG to the hole where the main gun normally went, so in the square hole you’ve cut in the middle of your new Mantlet glue in a smaller piece of tubing to represent the armoured cover these machineguns had ( I used the end piece of the 37mm gun barrel that comes with the kit for this). |
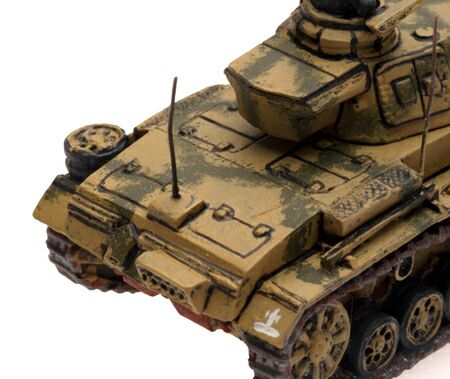
| Step 3 On the rear deck of the tank hull you will need to mount the extra aerial for the Observers radio set. This goes on the centerline of the deck between the rearmost engine louvres. A simple piece of plastic card or small piece of putty shaped suitably (I’ve seen squares and tubes -take your pick!) with your favourite aerial material glued into the center. 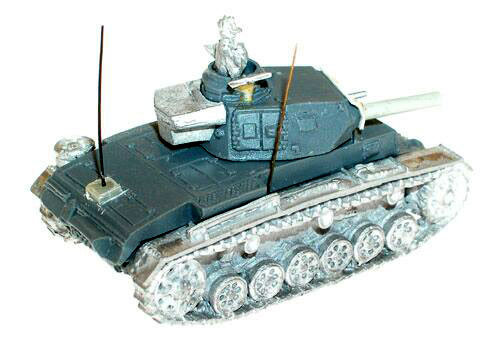 | 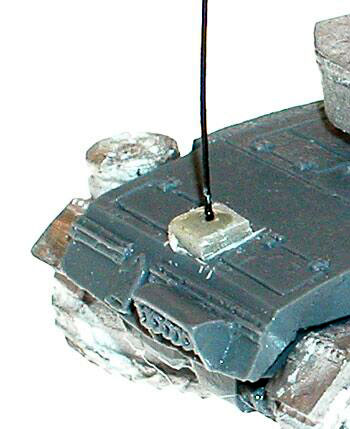 |
 |  |
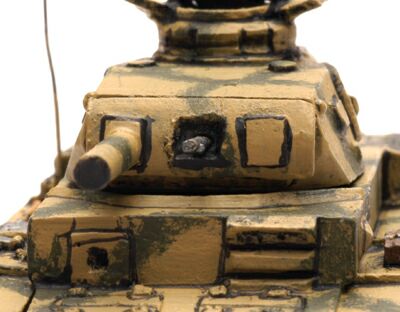 | Step 4 Paint to suit but remember these tanks would mostly have been repainted in the later Panzer Yellow colour after being converted. Markings would consist of the National Cross found on any German AFV and also the symbol of an Armoured Artillery Battery on either end (I can sense another article coming on here!) but turret numbers wouldn’t be found on these Tanks - they don’t belong to the Panzer unit they’re supporting. It’s a simple conversion to carry out and you don’t need to be an expert modeler for this but it gives you a necessary AFV to make your Self Propelled guns achieve greatness on the tabletop battlefield. Great modelling! Evan Allen |
 |  |
 |  |

Ingen kommentarer:
Legg inn en kommentar